Tag Archives: DIY

I made my own produce bags out of an old shirt

2016-05-19 21.49.36

I have been thinking more lately about how to reduce waste (we already don’t use any paper products besides toilet paper) in our house hold and how to use less plastics. I really wanted some produce bags so that we wouldn’t have to use the ones from the store for smaller produce items like the ones sold on Amazon below.


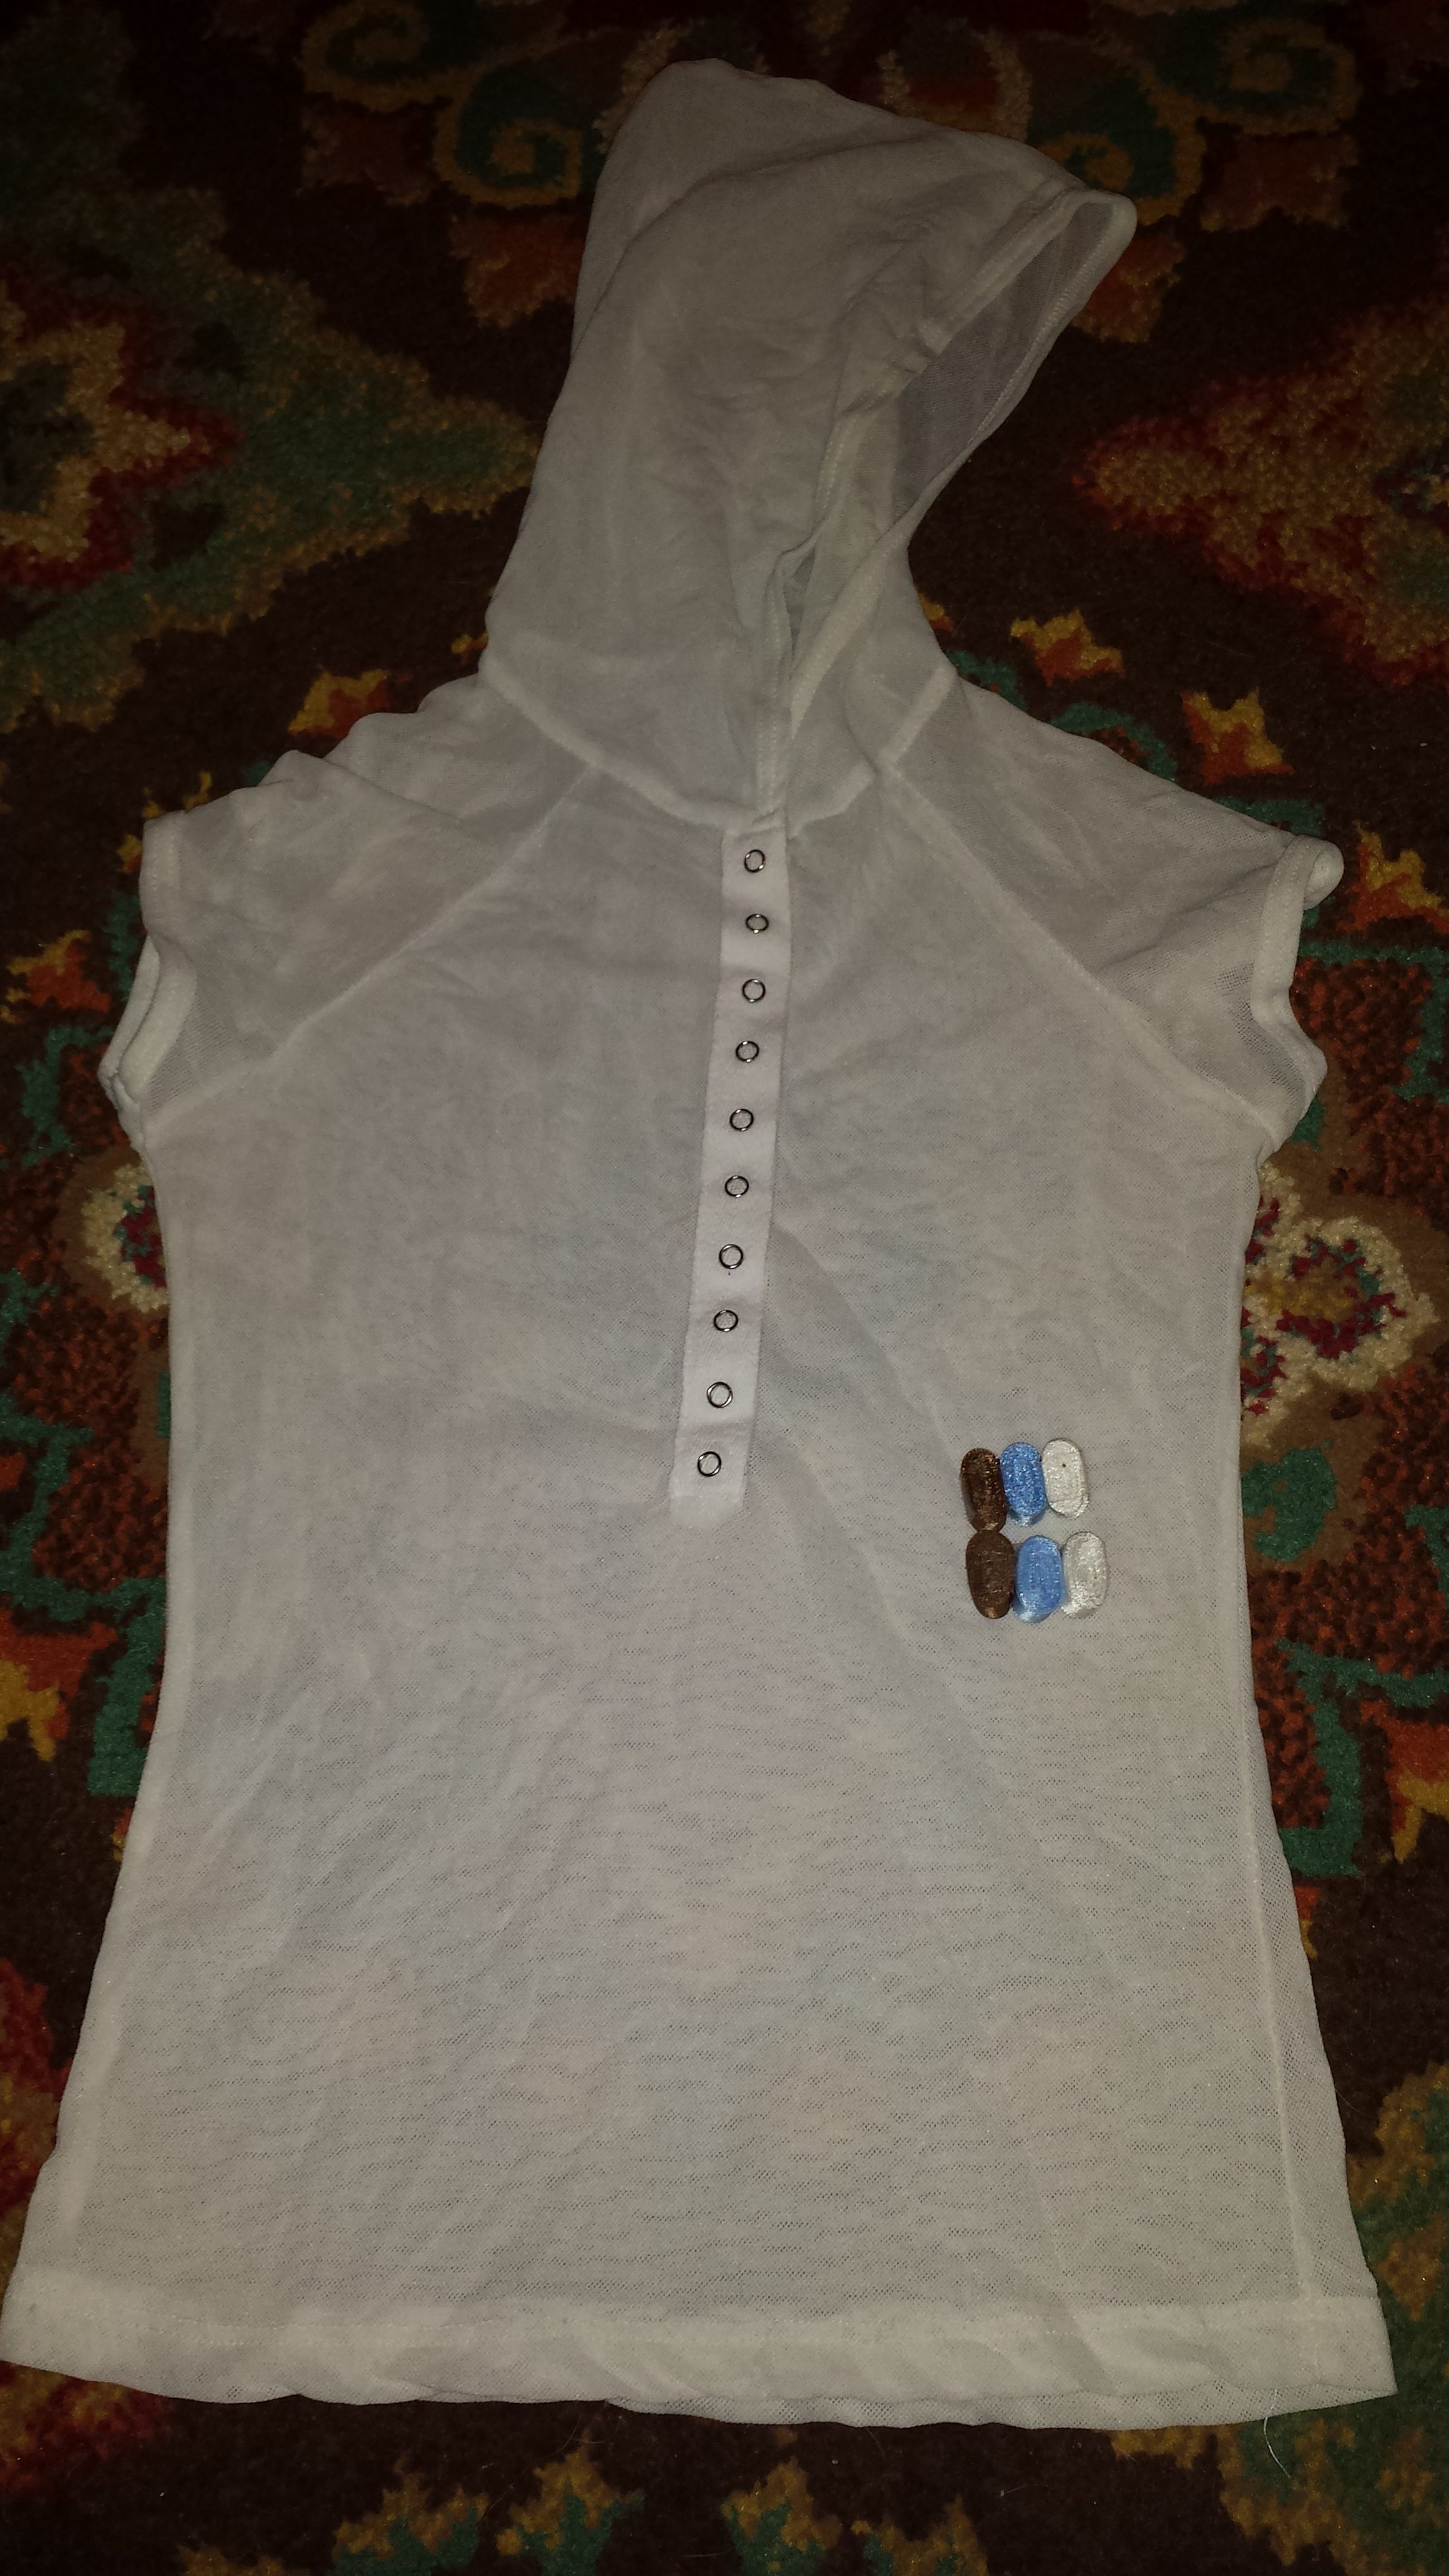
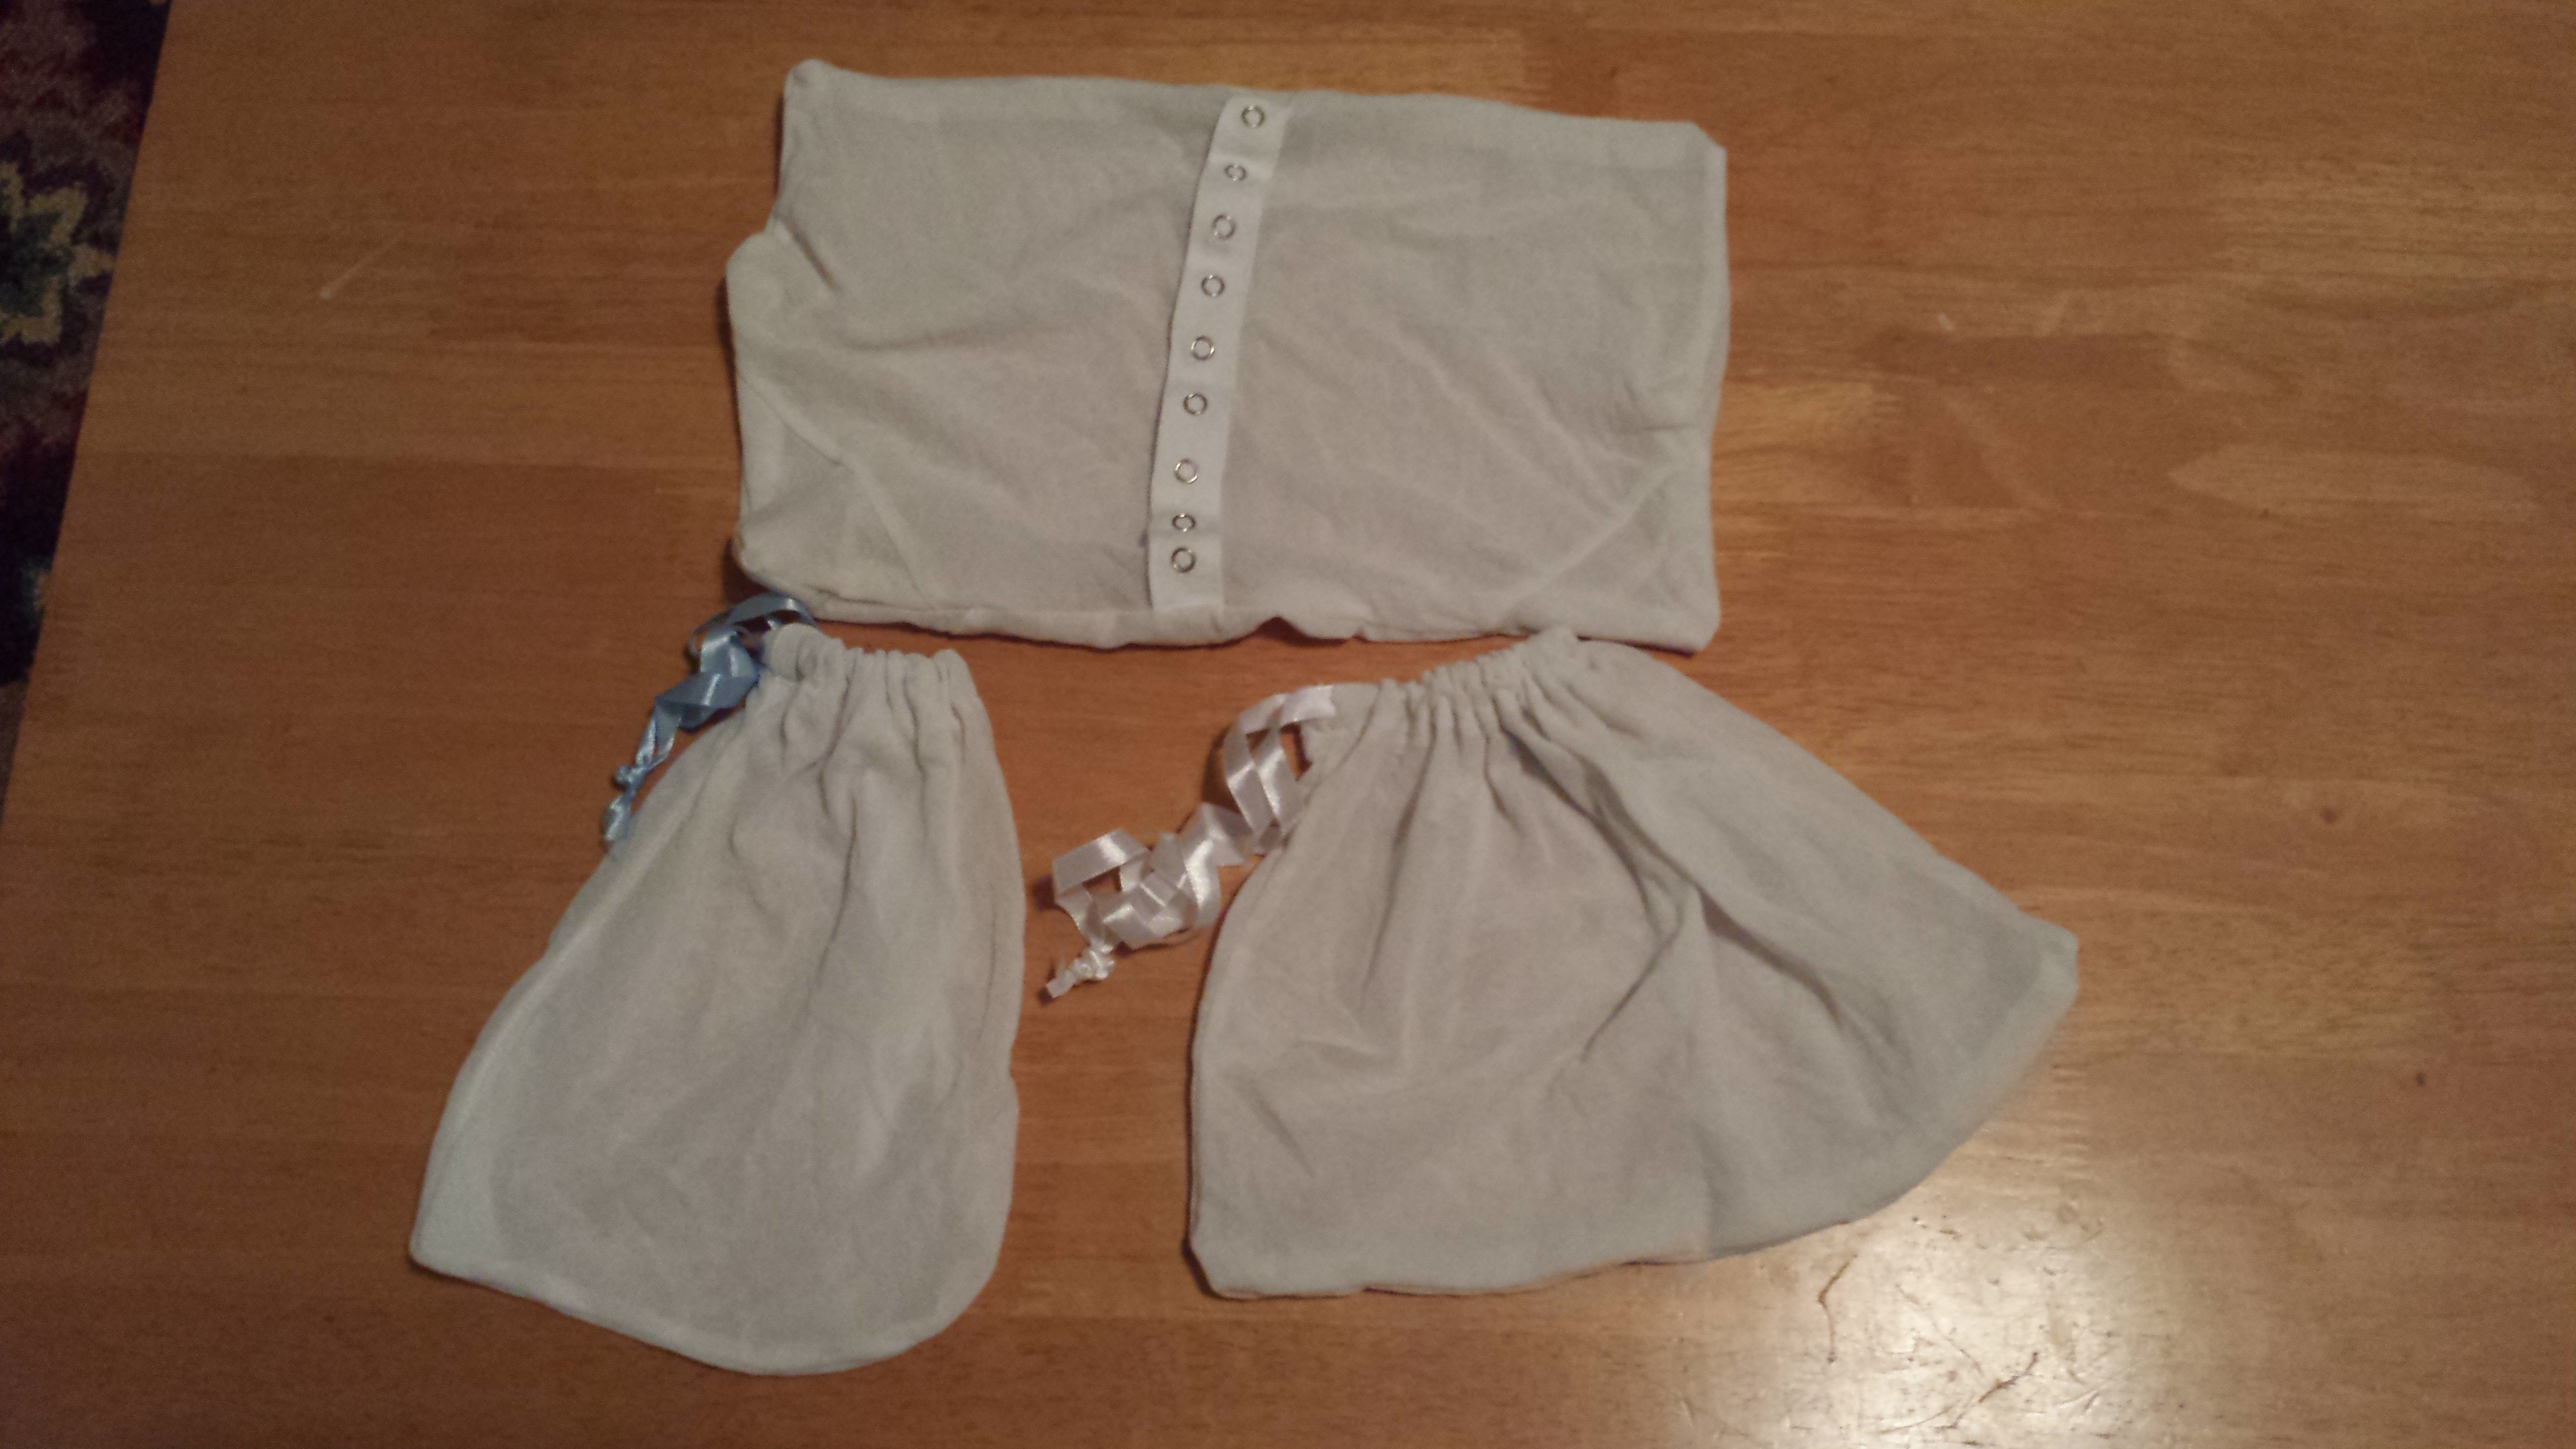
I recently learned to use my sewing machine and when I found this old shirt in the back of a drawer I thought it would be perfect to make semi-transparent produce bags. I also used a small 3 pack of ribbons that I had gotten for free out of the free box at a yard sale for the draw strings. I think they turned out well and I even made one using the snaps already on the shirt. So for free I now have three little produce bags and I am practicing my sewing skills.

2016-05-21 15.32.23

Goals for 2016!

Goals for 2016!

1.I am only going to buy my clothes from thrift stores. The only exclusion ,of course, will be undergarments.
2.Only buy items that bring me joy! I will not buy stuff just because it is on sale!
3.Research products before I buy them especially makeup!
4.Buy items that will last a lifetime that I will not have to throw away in a few months.
5.Work out at least 30 minutes a day! Lately I have been doing my own version of yoga/ pilates in my living room!
6.Read more and not just articles on the internet!
7.Become more inventive/ willing to experiment with food!
8.Research alternative living spaces/ tiny houses and if possible start to save $$!
9.Sell more stuff on eBay! I recently sold my first item. It was only listed for 1 day!
10.Go caving!!! I live about an hour and a half from San Antonio which has beautiful caves!

Posted by: Candy

image1-8

Two of my recent thrift store Vision cookware finds. I intend to use theses until they fall apart!

As you can see below they can be quite expensive!

4 Ingredient, Dirt Cheap, No Cooking, Chemical Free, Laundry Detergent! 

CheapFourIngredientChemicalFreeLaundryDetergentLaundry Detergent was one of the last items in my house to be replaced with a chemical free version. The main reason was because chemical free laundry detergent, like laundry detergent in general, is expensive. I also didn’t care to start making my own if it required cooking of any kind. For a long time I simply bought the concentrated $1 jugs from Dollar Tree. They aren’t bad but this recipe is better. I couldn’t believe my luck when I found this Dirt Cheap, 4 Ingredient, Chemical Free Laundry Detergent. I was originally worried it might leave behind some powder or residue but it doesn’t. It just works great!

Directions:

Put all the ingredients in a container and mix them up.

Ingredients:

1 1/2 cups Baking Soda
1 1/2 cups Washing Soda
1/2 cup Epsom Salt
2 Tbsp Kosher Salt or other coarse salt

To Use:

Use two heaping spoonfuls for a large load of wash. Use your best judgement for smaller loads.

Thank you to Tatiana Amico for this recipe.

FourIngredientChemicalFreeLaundryDetergent

My $2.99 Cabinet Before and After

2014-08-07 16.53.34I bought this ugly little brown cabinet (It’s actually drawers but looks like a cabinet) for $2.99 at a local thrift shop. Using one can of green spray paint I transformed it into something that I love having in my living room! It takes the place of a side table but with the added bonus of extra storage. I’m so excited about how this turned out I’m looking for more pieces to transform.

Saw It On Pinterest and Tried It- Homemade 2 Ingredient Downy Wrinkle Releaser- Can Be Natural/Organic!

EDIT: I must report that after I posted this I discovered that you can literally just use a spray bottle with water to take wrinkles out of almost all clothing. I’m a college professor so I’m constantly spraying down business clothes and it works!!!!

homemade downy wrinkle releaser

image

We LOVE Downy Wrinkle Releaser because it’s so much easier than ironing, especially while we are traveling. However, I became concerned about the chemicals that were in it that we were spraying all over ourselves. So when I found this recipe I was really excited to be able to make my own.

Need

Fabric Softener of your choice (the cheap stuff is fine, you can buy a jug for $1 at Dollar tree)
* To make this Natural/Organic use Natural/Organic Fabric Softener
* Remember that the scent of your fabric softener is the scent of your spray so make sure you pick one you like

– Water

– A Spray Bottle ($1 at Dollar tree)

Recipe

– Mix 1/3 cup of water with 1 teaspoon of fabric softener in a spray bottle

*multiply this recipe to make a larger portion

I happened to have a couple of free in the mail samples of fabric softener and I wanted to try making it for free before I buy natural/organic fabric softener to make it with. The single sample size portion you see in the photo above was large enough to make enough mix to fill the above spray bottle several times and I still have some left over.

BEFORE

image

DURING
image

AFTER
image

Thanks, TheMakeYourOwnZone for this pin on Pinterest that really works!

Make Your Own Natural/Organic Hand Soap with Only 2 Ingredients

soapwithtextcropIf you have been reading about my Natural/Organic adventures and deals HERE then you already know that I have been replacing the cleaning and personal care products in my house with Chemical Free options. I wanted to find a good alternative to our hand soap especially because I often have dry, cracked skin on my hands and wash them a lot. I ended up purchasing Dr. Bronner’s Pure Castile Soap which is made from olive oil and I did a little research on how to turn it into hand soap.

You Need-

– Dr. Bronner’s Castile Soap scent of your choice

– 1 Empty Foaming Hand Soap Pump – $1 at Dollar Tree (I gave away the soap and kept the bottle)

– Water

Hand Soap Recipe-

– 1/8 Parts Dr. Bronner’s Castile Soap

– 7/8 Parts Water

*This isn’t an exact recipe so I don’t measure, I simply eyeball it*

– Mix it in a foaming hand soap pump. This part is important because if you use a regular soap pump like I did at first it’s really runny and you will use more. However, it makes a great foaming hand soap.

It’s that easy!

You do have the option of adding an essential oil for a different scent but I like the way the Almond Dr. Bronner’s soap smells so I don’t find that necessary. You can also add Tea Tree Oil to make the soap antibacterial but we didn’t use antibacterial soap before we went organic so we haven’t tried that yet.


Click HERE to read about more of my Organic / Natural / Chemical Free adventures.

Thanks, to MyMerryMessyLife for help with this recipe.

My $20 Goodwill Bench Before and After

BEFORE
image

For a couple of months I’ve been thinking about how I would really like to have a bench in the small entrance way in our house. I was surprised to find the above bench for less than $20 at Goodwill despite the fact that it was a little scratched and a small dog had gotten a hold of it’s bottom right leg and chewed it up a little.

imageI knew that when I was done, will a little help from some of the stain sticks my mother and I have acquired through the years, that you would never be able to tell it had been damaged. What I didn’t know was that my new-to-me bench would actually look like new. I just wish I had taken a picture of the pile of shoes that used to sit where the bench is now so that you could see how much better it looks and you would never guess it’s already full to the brim of shoes.

*Stain Stick Tip*- Grab a small rag and wipe over the spots you have colored in. It helps to blend the stain into the grain of the wood so it looks a lot more natural and has less marker lines.

AFTER
image

If anyone knows where this bench originally came from please leave me a comment. I would be curious to hear.

How We Turned A Bird Cage Into A Small Pet Cage

imageA few months ago we decided to buy a friend for our pet rat Benny. We wanted to buy a dumbo rat since Benny is a regular albino feeder rat, however, the pet store had two Dumbo rats and I just couldn’t split them up. So we now have three pet rats- Benny, Olive, and Ash.

image

You can see Olive and Ash in the above picture, with Benny’s cute little pink feet in the corner. What we didn’t anticipate was that Benny and our new ratty babies didn’t get along when they first met. We found ourselves needing another cage from them as they were rapidly outgrowing the small pet playhouse they were living in. Coincidentally, my friend had an old bird cage that she was willing to sell me for $20.

imageWe ended up converting the bottom metal wired floor into a second floor and cutting part of it to form a ladder to the first floor so they could climb up. We fill the pull out tray at the bottom of the cage with bedding and it is really easy to clean up. Another advantage of the bird cage was that it had a door on the side that we propped open so that the ratty babies could travel from their new cage to their old playhouse and back. Now they have a whole Rat Condo and for $25 cheaper than the smallest rodent cage at the pet store.imageFortunately, all of our rat babies now get along and they take turns all living together in the different cages.


You might also be interested in-

– Free DIY Houses for Small Pets

Make Your Own Small Pet Hammock

DIY Pet Water Bottle Holder

Free Fun- Free Cookies From The Petstore

Saw It On Pinterest and Tried It- Label Your Power Strip for Free

image
So I saw this idea on Pinterest and was reminded that I wanted to try it. I believe I may have read it in The Tightwad Gazette before Pinterest ever existed. In any case, the idea is to take old bread ties and use them to label your power strips. At the time I tried this I had very little plugged in but it still worked really well. Even when I unplugged and replugged certain items the tags stayed on. This motivates me to try even more of the fun ideas I see on Pinterest.

image

To see even more fun and frugal ideas click the logo below and…
followmeonpinterest

DIY Pet Water Bottle Holder

imageWe recently bought two Dumbo rat babies so that our Albino Feeder rat turned pet, Benny, would have some friends. However, they don’t entirely get along so they are currently in separate cages and I had to buy them another water bottle. Rather than paying another $6 for a water bottle holder, we made our own from a wire hanger. Not bad for 5 minutes worth of work. 🙂 Click the Instagram button below to see a lot of cute pics of our ratty babies.

instagram

Related Posts Plugin for WordPress, Blogger...